Share "How to Shiplap a Wall"
Shiplap is a trendy, versatile design option, and it is easier than many people realize to shiplap a wall. With some simple steps, you can rejuvenate any space with this amazing technique.
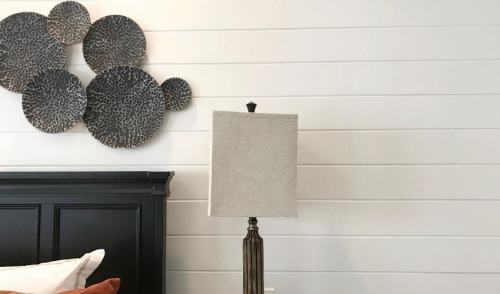
What Is Shiplap?
Shiplap is the name for a series of wooden boards or slats that make up wall panels with distinct small gaps between the slats. It was originally named for the construction of wooden ships, but today is a favorite option for creating a rustic, farmhouse, or vintage look to walls. Shiplap is typically arranged horizontally but can also be done vertically, and may be left raw or painted or stained in different shades.
As an interior finish, shiplap can be used in any room. Used thoughtfully, shiplap can create a cozy feeling for any bedroom, bathroom, entryway, kitchen, family room, or even a stairway or screen porch.
DIY Tips to Shiplap a Wall
Depending on the size of the wall you want to shiplap, your familiarity with the necessary tools, the type of shiplap you prefer, and your own DIY experience, it could take just a few hours or a weekend to install shiplap. This is an easy process that can quickly renovate any space and bring a rustic, vintage vibe to your home.
- Measure your wall carefully to ensure you purchase enough shiplap slats or wooden planks for the project. If your budget allows, buy 1-2 extra planks in case of errors or problems.
- Store your planks in the room where they will be installed for 5-10 days before you start your project. This will allow the planks to adjust to the room’s humidity and temperature to minimize warping, cracks, expansion, or other problems after installation.
- Prepare the wall by removing everything, including artwork, nails, baseboard, wall plates, and outlet covers. If the wall is damaged, repair the surface before installing shiplap.
- Paint or stain the wall if needed. If you are using true shiplap planks with interlocking grooves, the entire wall will be covered. If you are using wooden planks to create a shiplap style with spacers, however, a thin line of the wall will show between planks. You can paint the wall the same as your planks, or choose a coordinating or contrasting color for more visual interest.
- Paint or stain your planks if needed. Some planks come pre-painted, or you may need to paint or stain the planks yourself. This will be much easier to do before they are installed on the wall. Be sure you give them adequate time to dry and cure before continuing with installation.
- Find and mark studs on the wall. To keep your shiplap planks secure, they will need to be fastened to wall studs. Draw a chalk or pencil line to mark each stud for easy reference as you work through the entire project.
- Start at the bottom when installing planks. Be sure your first line of planks is level and even to ensure a smooth, uniform look as you progress up the wall. Use wall adhesive, finishing nails, or both to attach each plank firmly to the wall.
- Move up the wall with successive planks, ensuring each grooved plank fits tightly into adjacent planks. If you are using spacers, easy options include nickels or popsicle sticks, and will create a uniform spacing between planks. As you encounter obstacles such as outlets and switches, trim planks as needed to allow for them.
- Stagger the end cuts on your wall for a more authentic rustic look. Smaller walls may look best without any end cuts visible, but longer, larger walls will have more character if the ends are staggered. If preferred, you can fill in the cracks instead to give the illusion of very long planks.
- After you’ve finished with planks, reinstall your baseboard, crown molding, switch covers, and other wall accessories as needed. Ensure everything is even, level, and tight-fitting for a professional look.
- If desired, fill in and paint nail holes to match the planks. You could also choose to leave them visible for a more rustic look.
Shiplap is a versatile, appealing finish for any indoor space, and by knowing different tips and tricks to shiplap a wall, you can easily add this look to any room to create instant appeal and coziness.